Sorry this post is a little late in coming up. I was helping my DD learn how to transform functions on a graph last night and the post was postponed. hee hee.
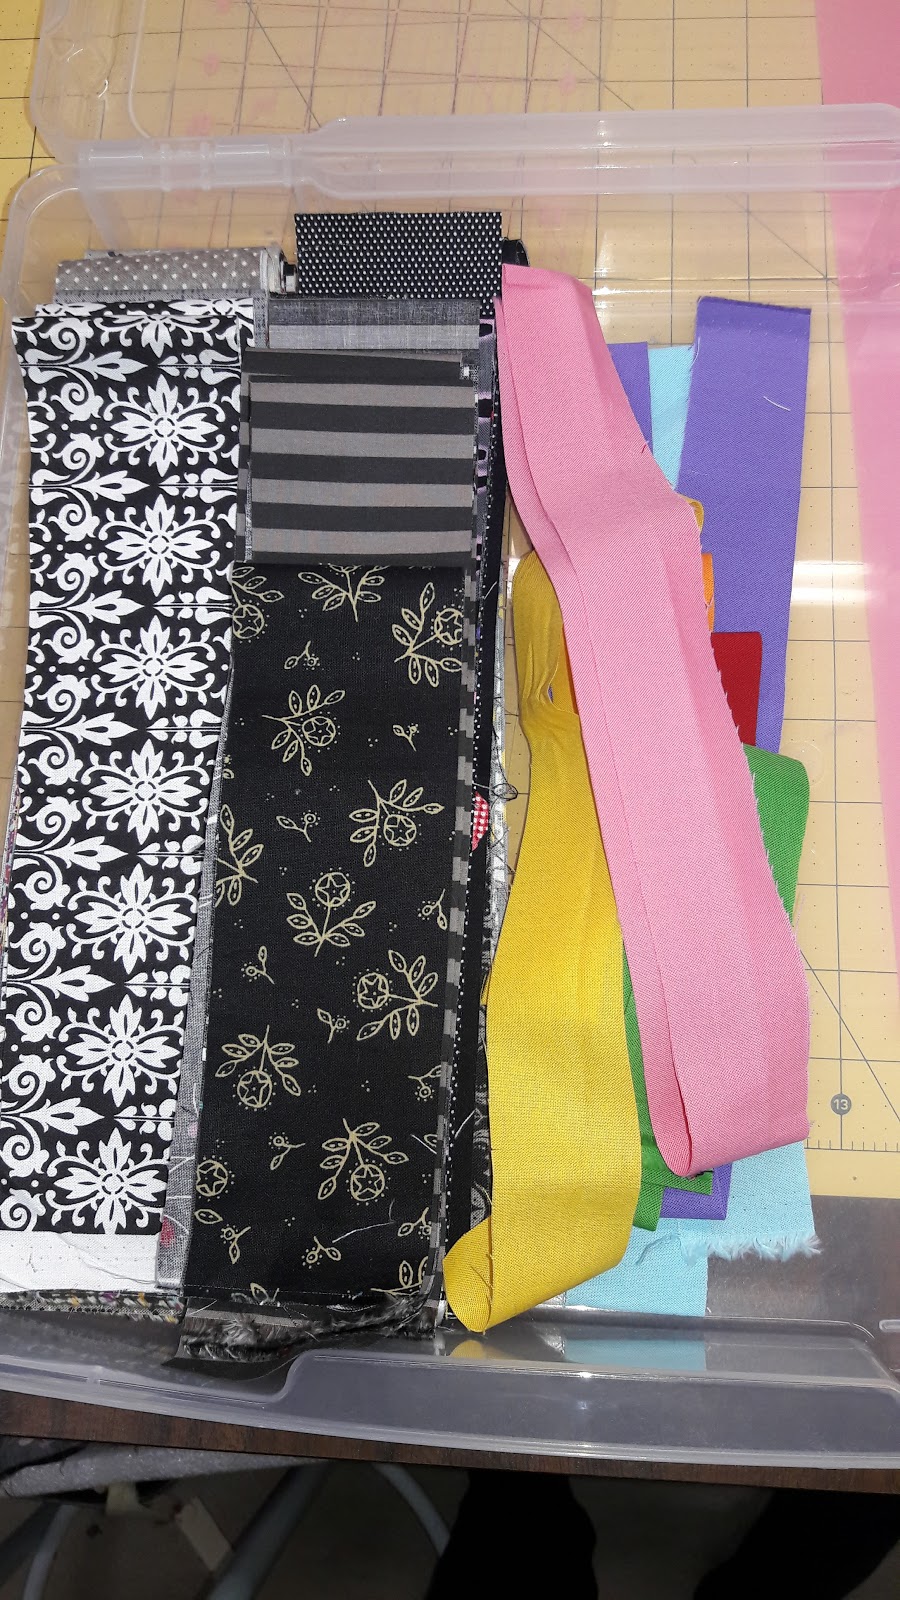
My black and gray scrap bin was full and getting the lid to fit on was becoming impossible. Well, if you know me you know that means it’s time to design a quilt around those scraps.

So I pulled the larger pieces. I do have a plan for the smaller ones, I’ll share that another time.

Cut them into 2 1/2″ strips. Added 1 1/2″ strips of some bright solids.
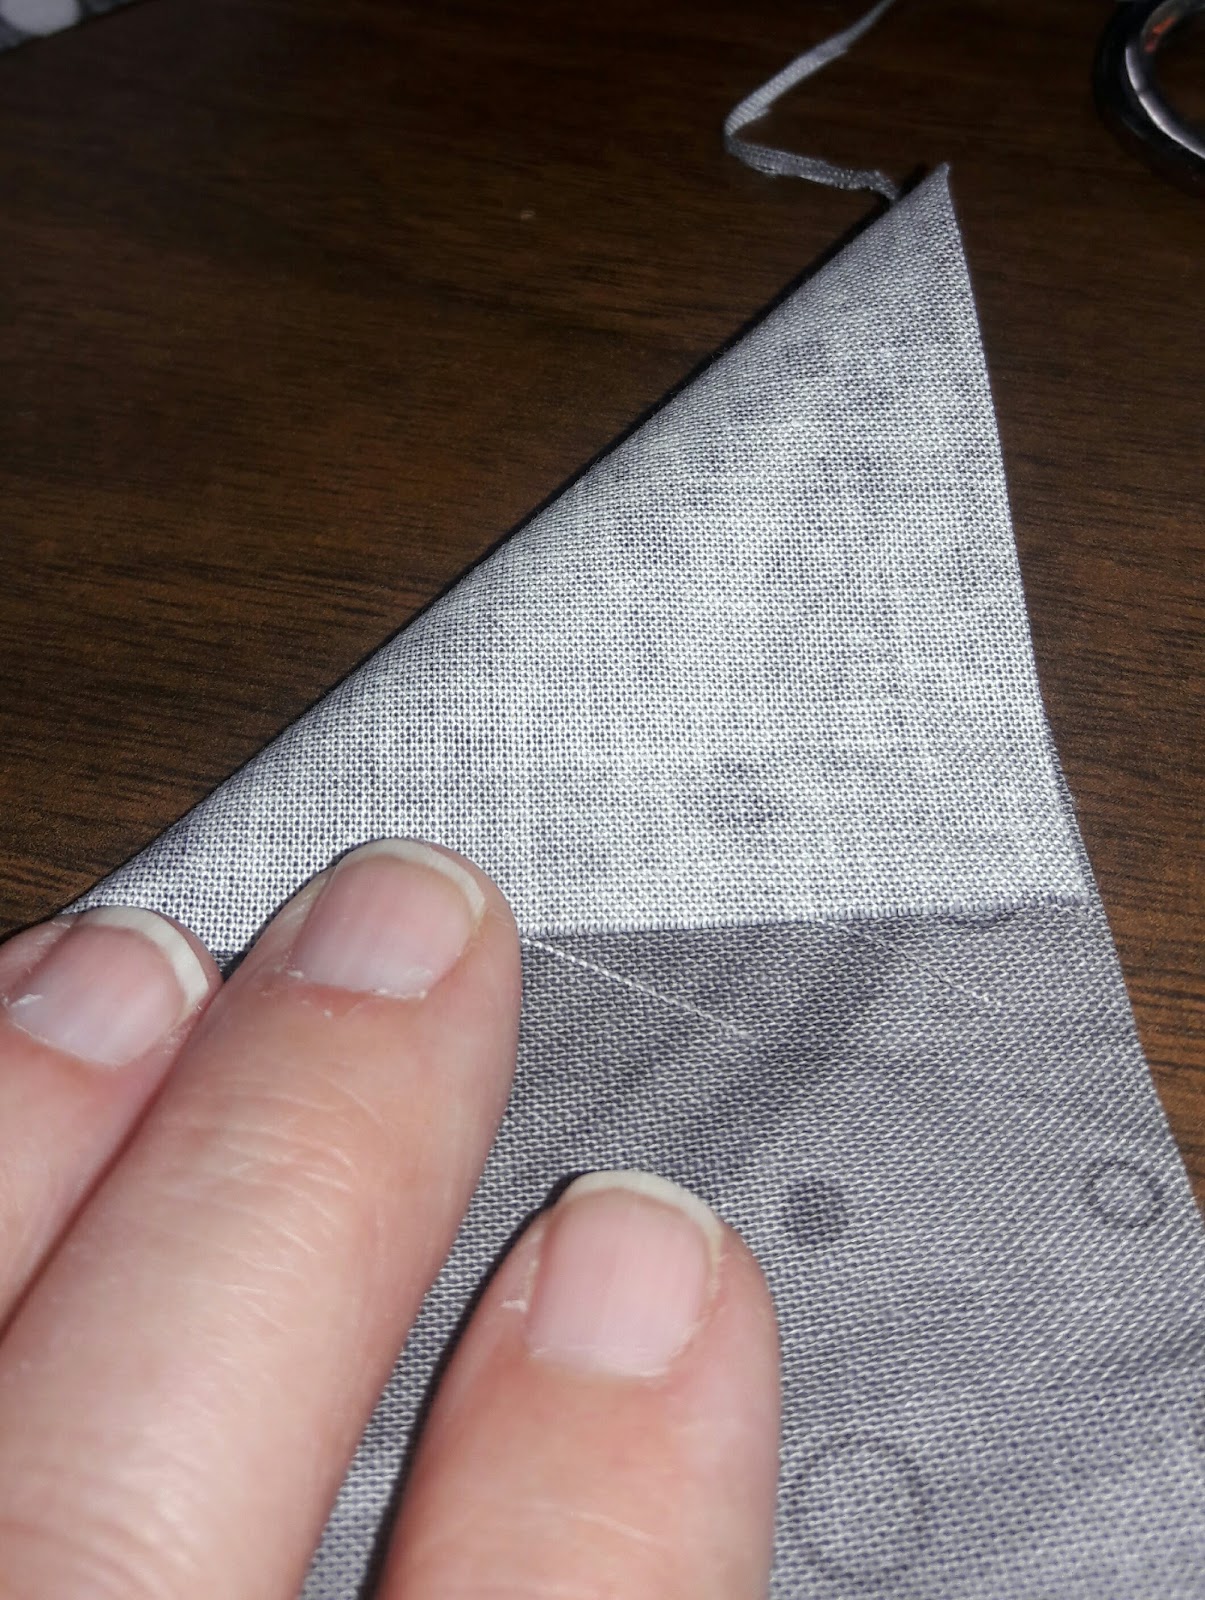
Then I started sewing them together. Because I knew I would be cutting these strips into quarter square units I staggered them. I do this by folding the end at a 45* angle and starting the next strip at the end of the triangle this fold makes.
Cutting Quarter Squares
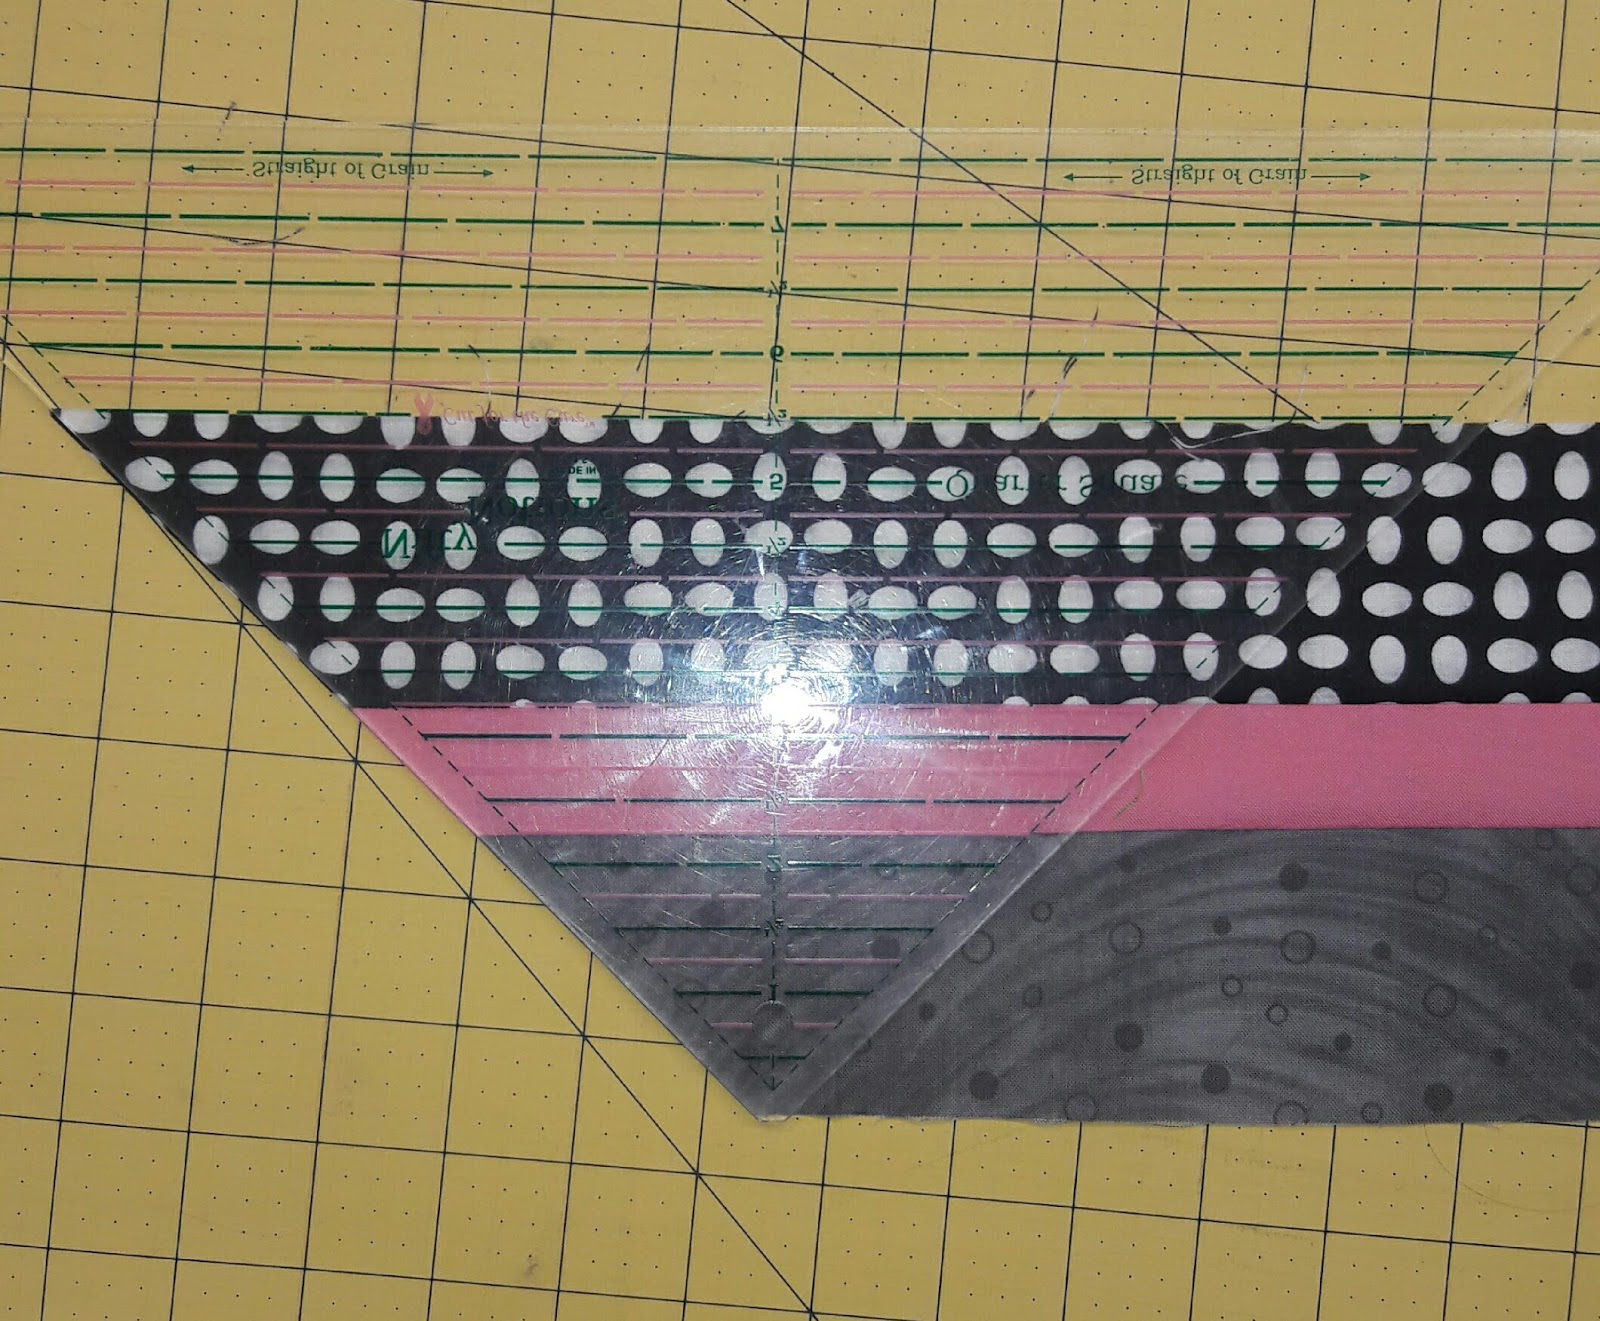
Once I had the strips sewn I used my Nifty Notions quarter square ruler to cut my triangles. Lining up the top with the edge of the ruler and the bottom with the 5 1/2″ mark.
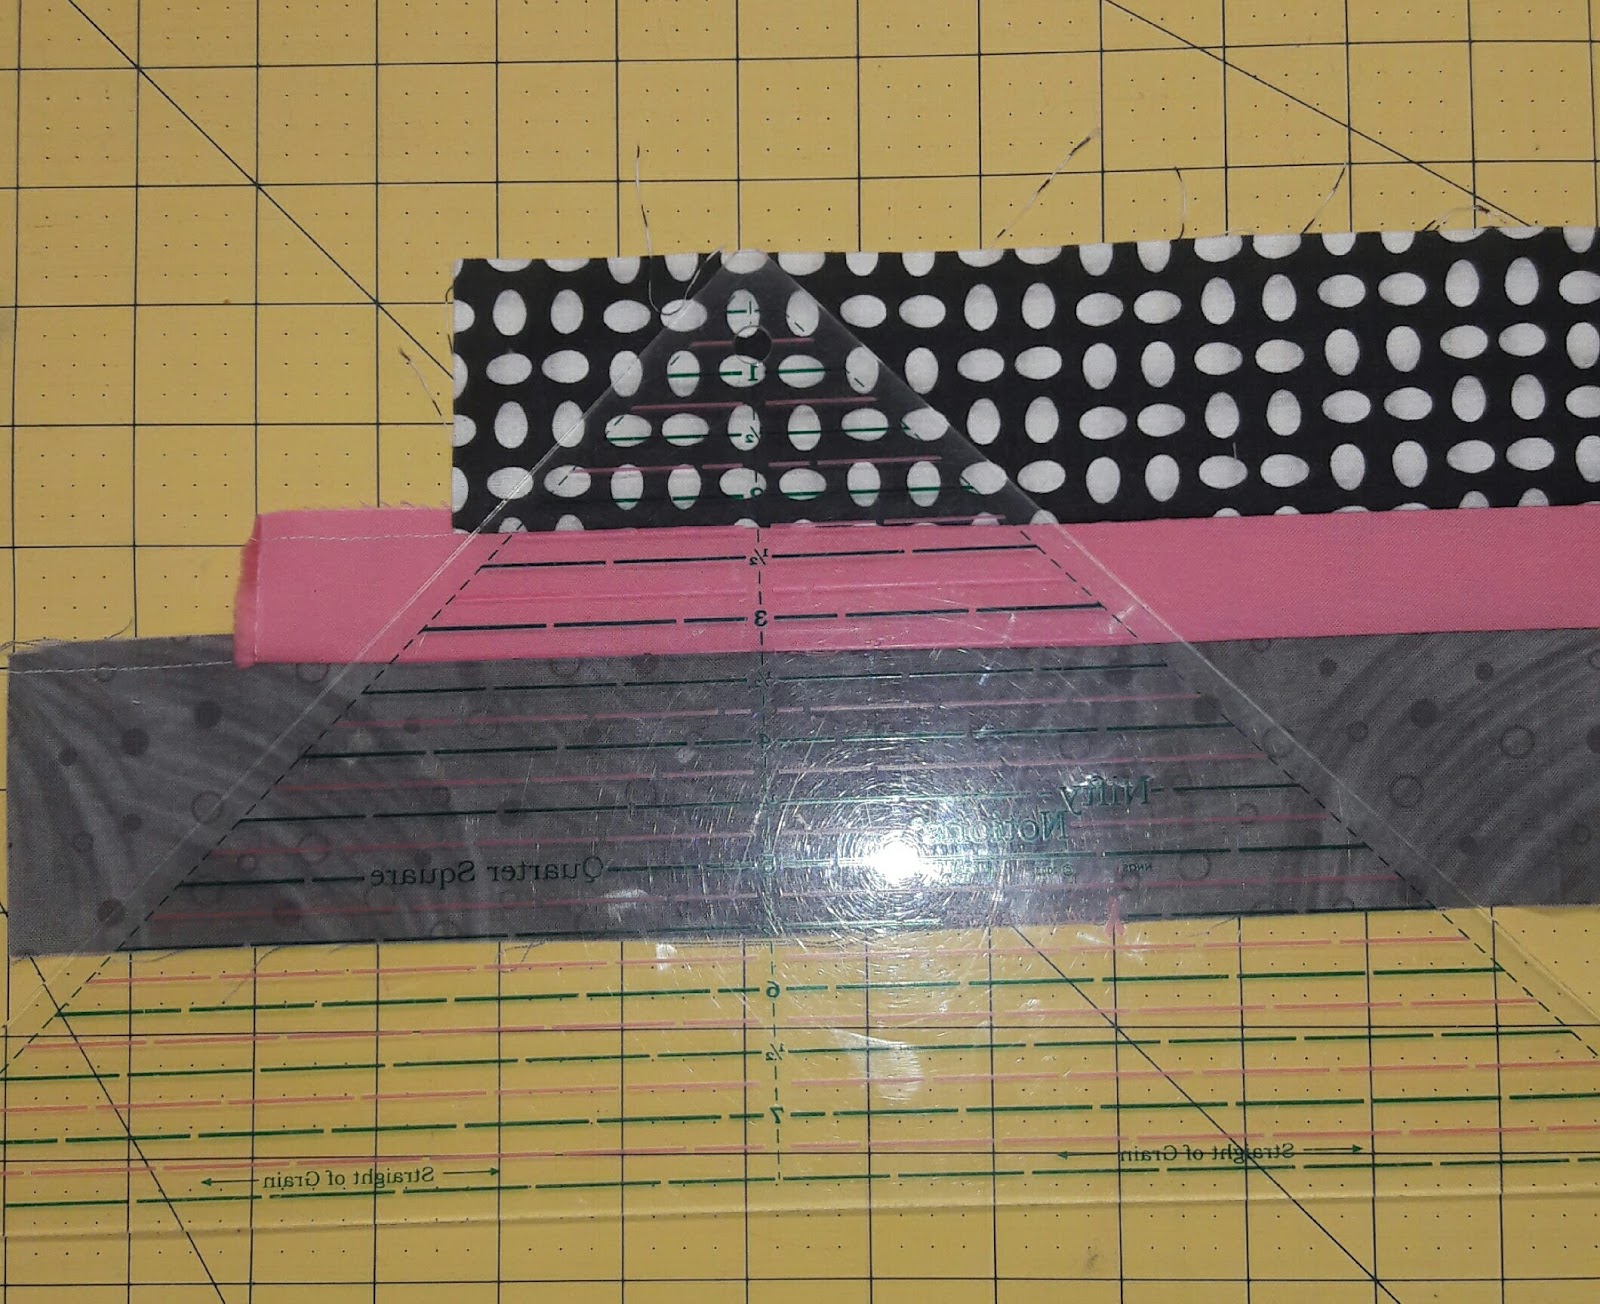
Then I flip the ruler the other way and cut as many as my scrappy strip allowed.
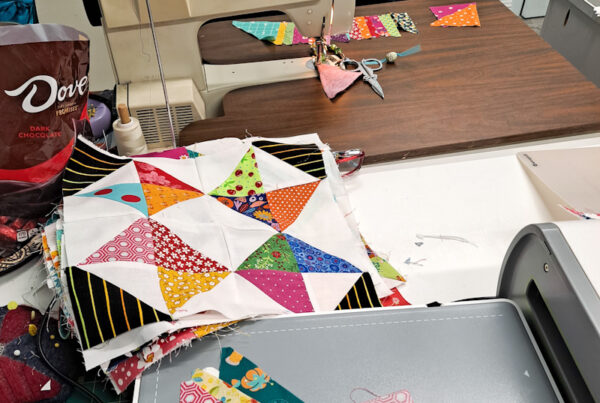
As I made them I threw them up on the design wall.
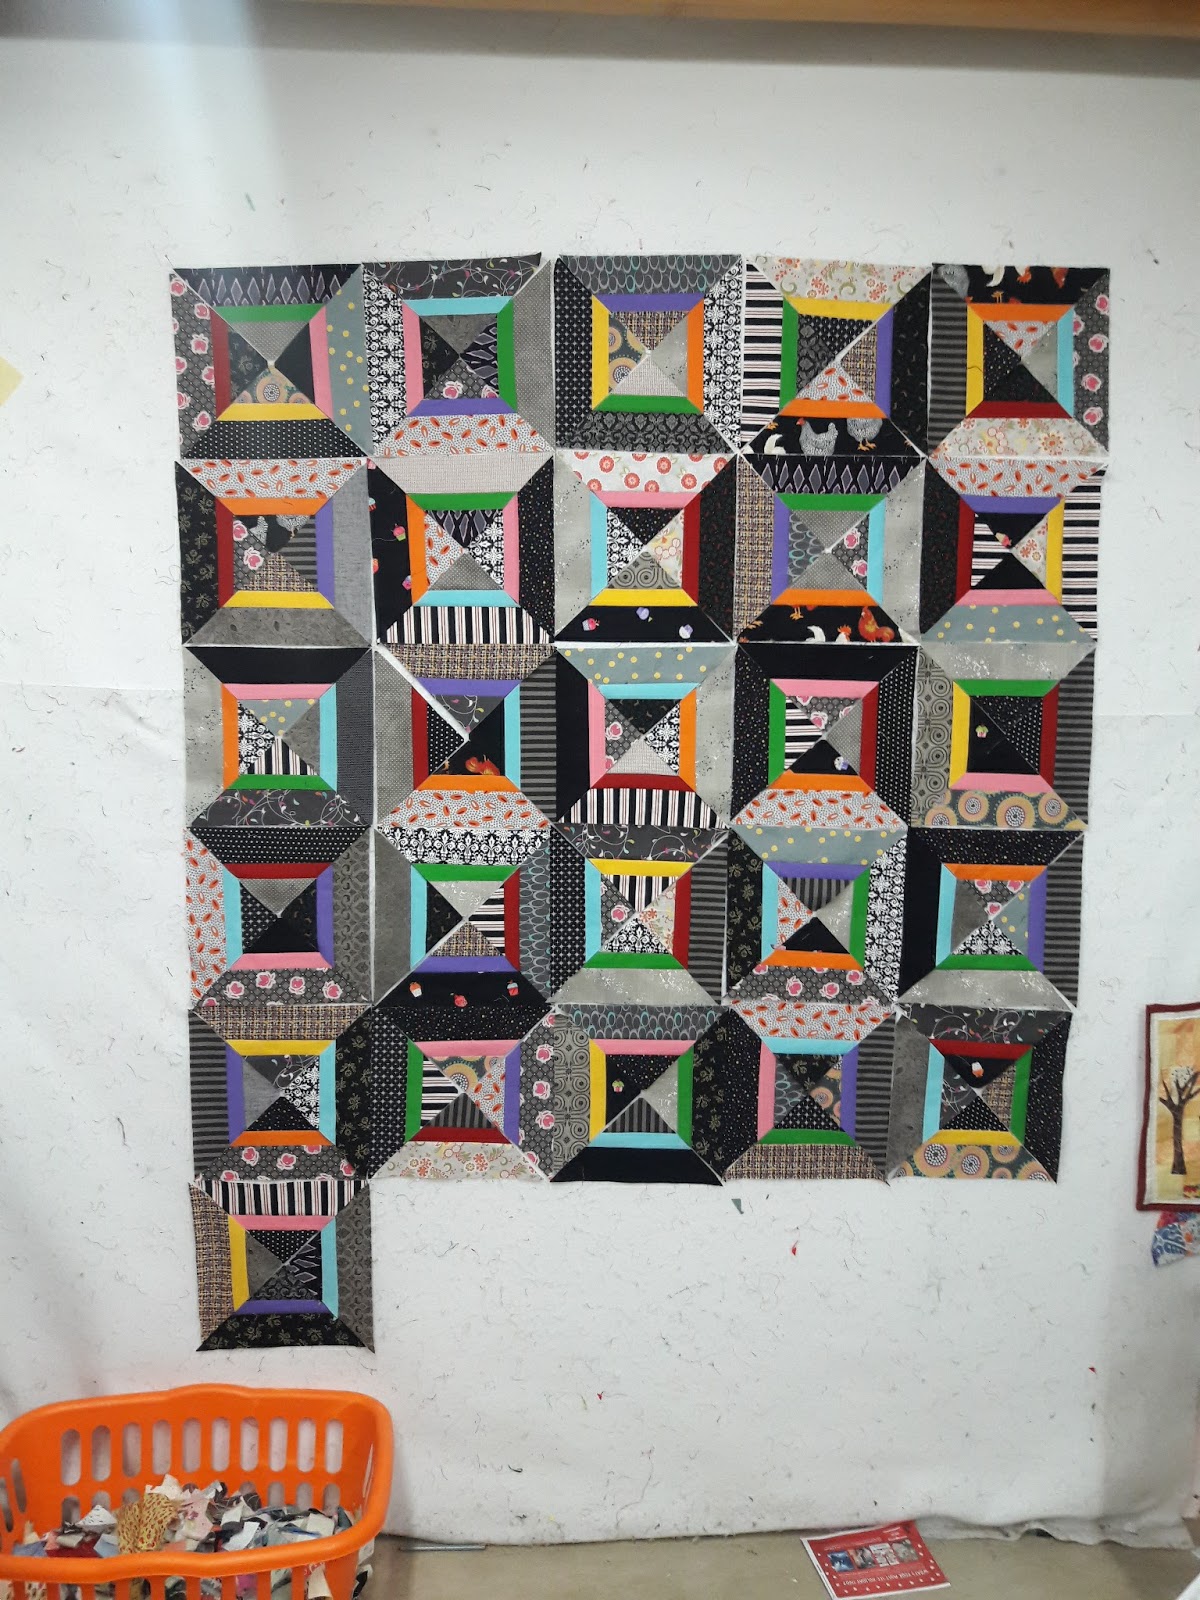
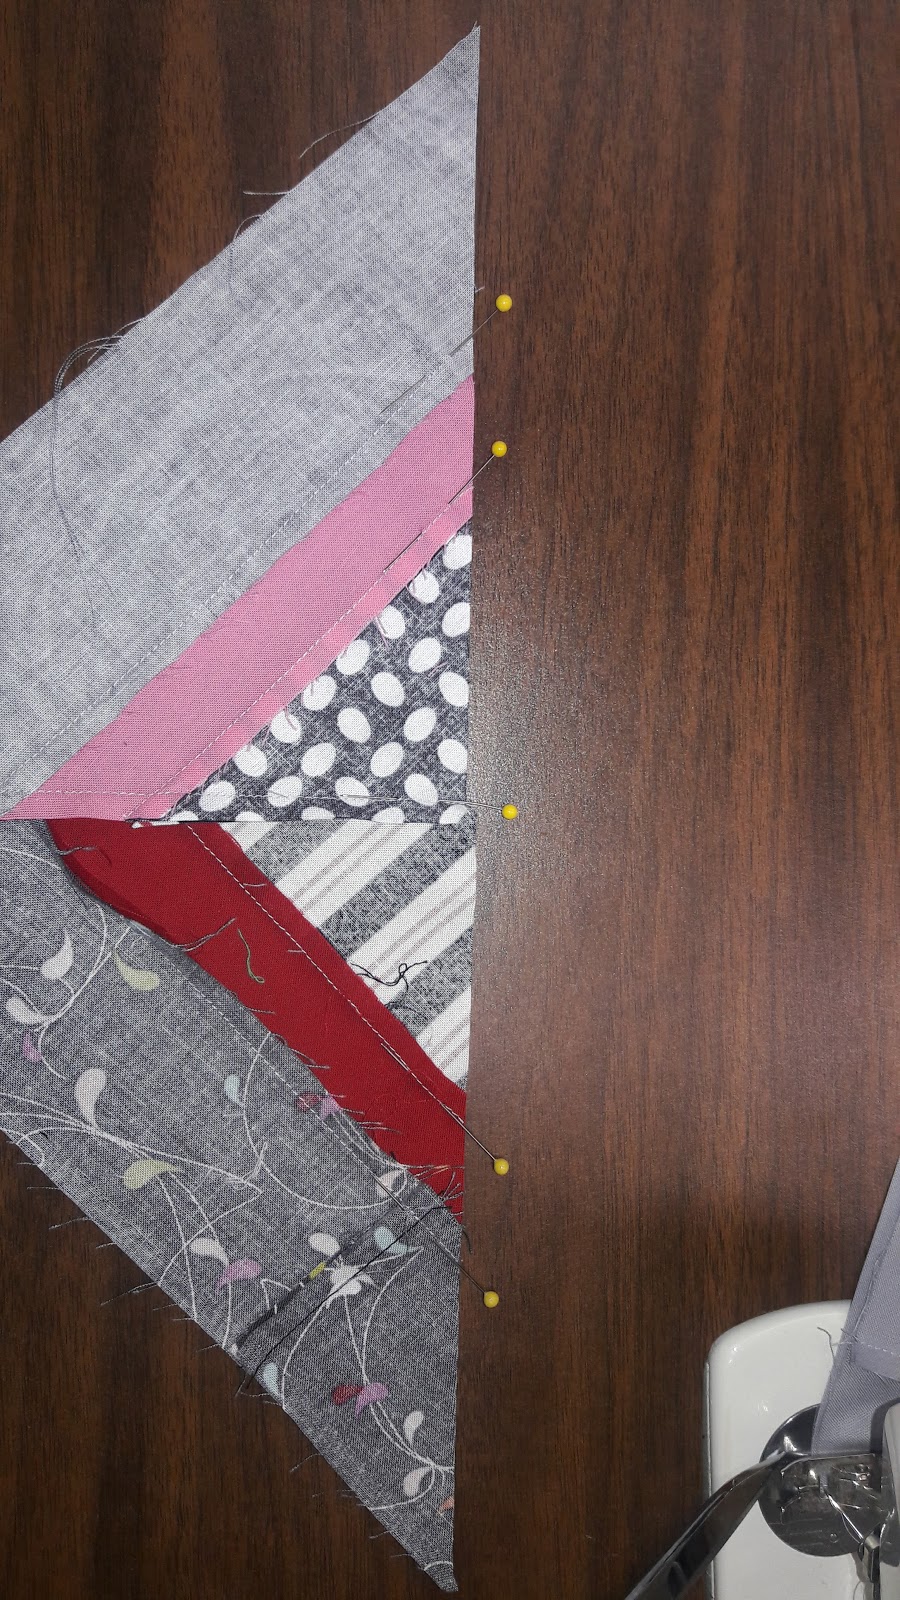
Once all of them where made I sewed them together by first taking to adjacent triangles and pinning at the seams to ensure that every thing was lining up. Then stitching in place. Repeating with the remaining triangles in the block unit.
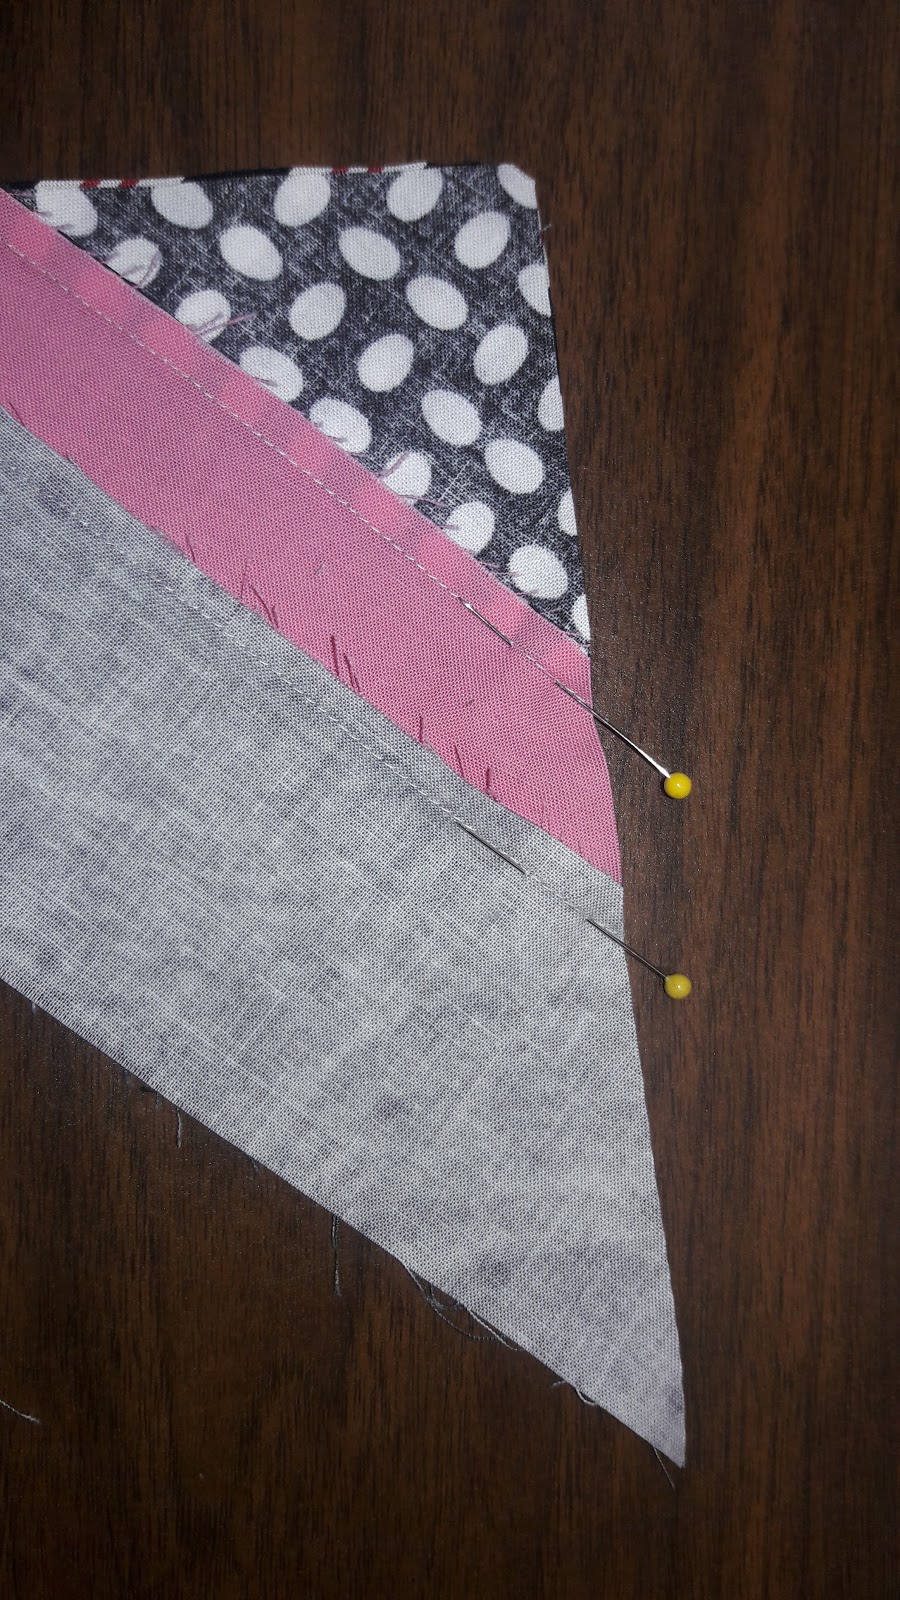
Then I took the two sets of triangles and pinned them together matching all seams and stitched together. You might notice that I pieced some of my strips. I was running low at the end and wanted to use up the scrap strip rather than cut into my stash and create more scraps.
When all the blocks were sewn I sewed them into rows and then sewed the rows together.

Hoping someday soon to be able to baste it and get it quilted.