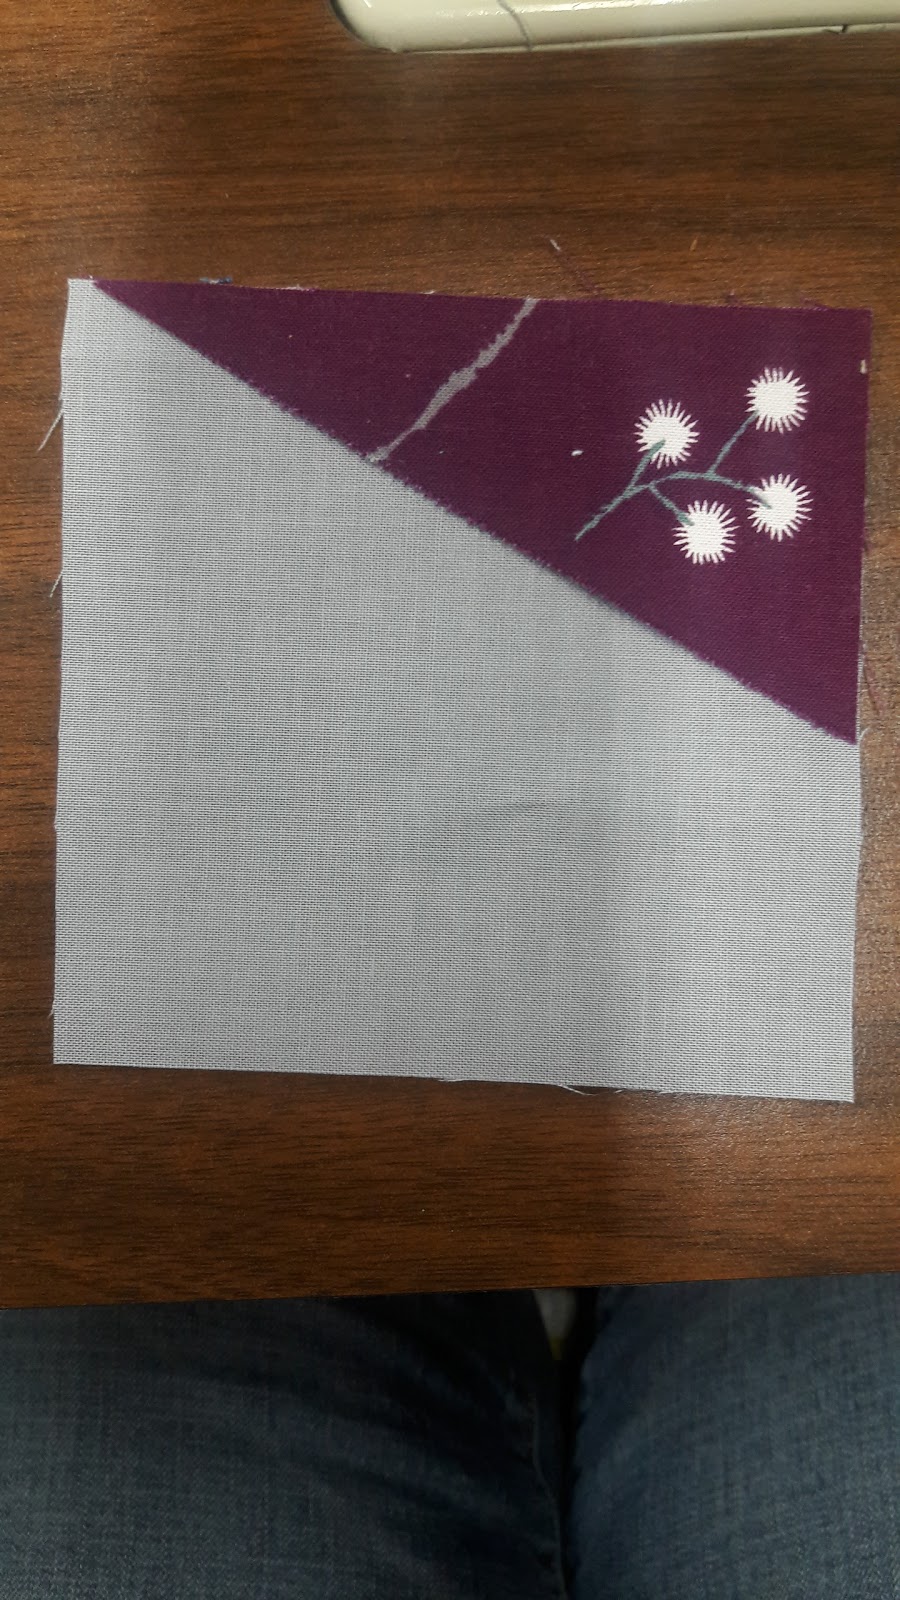
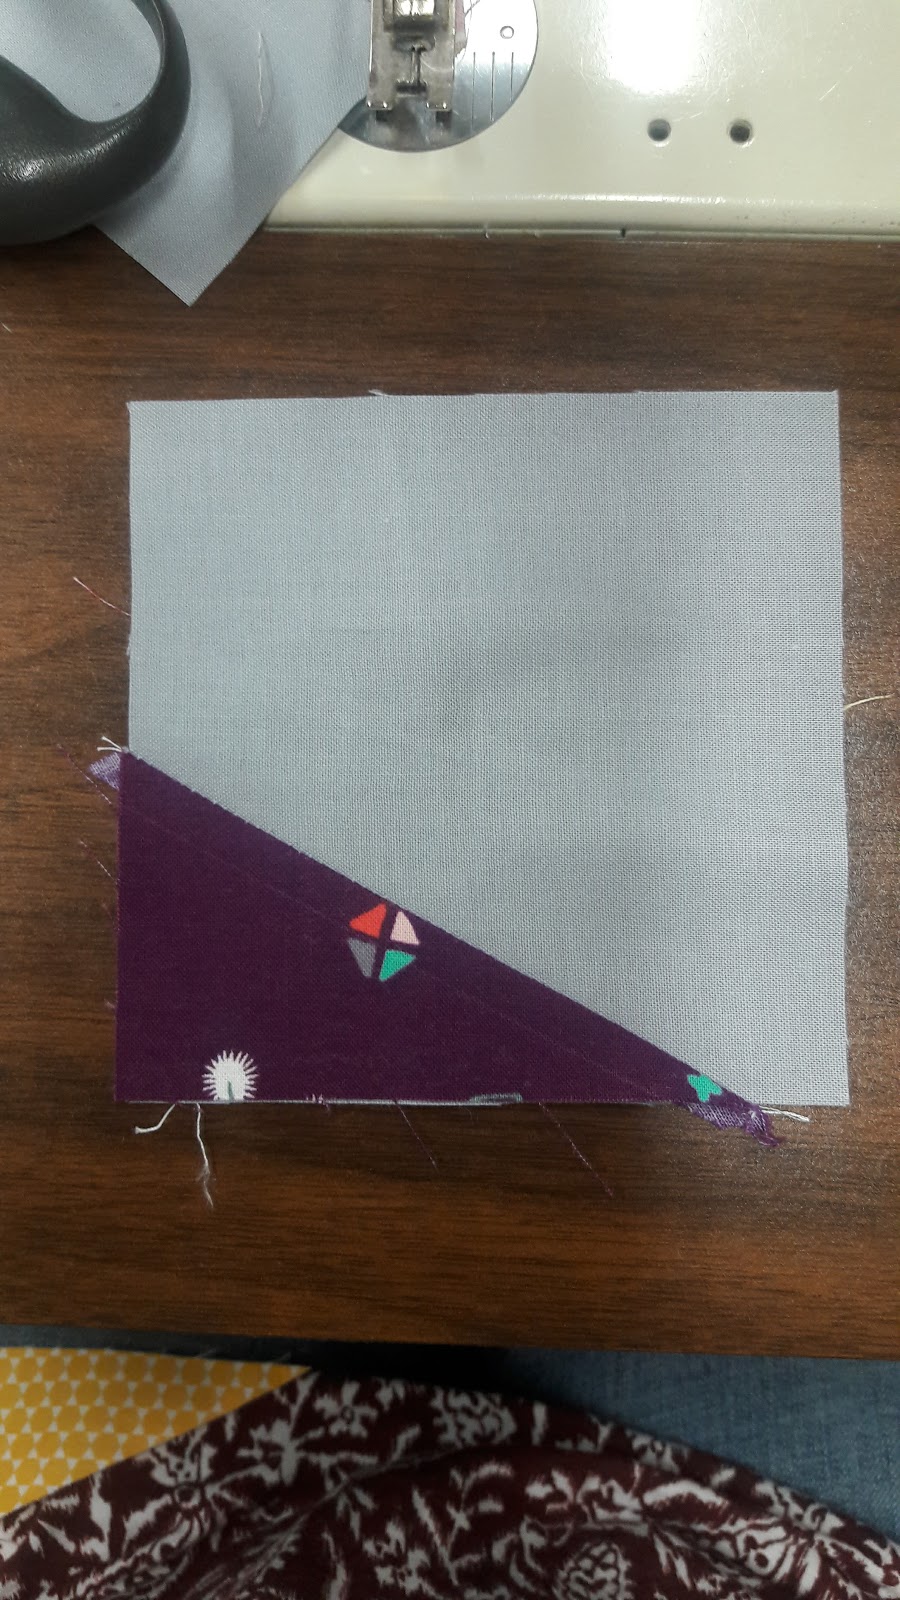
I’ve had a request for how I make my uncut diamond blocks so I thought I share my method today. I start with an odd shaped 90* angle rectangle. If you don’t have these in your scrap bin you can make them by using a rectangle. For the 4 1/2″ square background I used for these blocks I used rectangles that were 2-2 1/2″ wide and 3 1/2″ – 4″ tall. Then cut on the diagonal. I cut some from right to left and others from left to right so I had opposing triangles. Lay your triangle over your background square so the 90* angle edges line up with one corner of your background square.

On the third side of your triangle use a ruler and measure in 1/2″. Take a Clover Hera Marker and run along the edge of your ruler
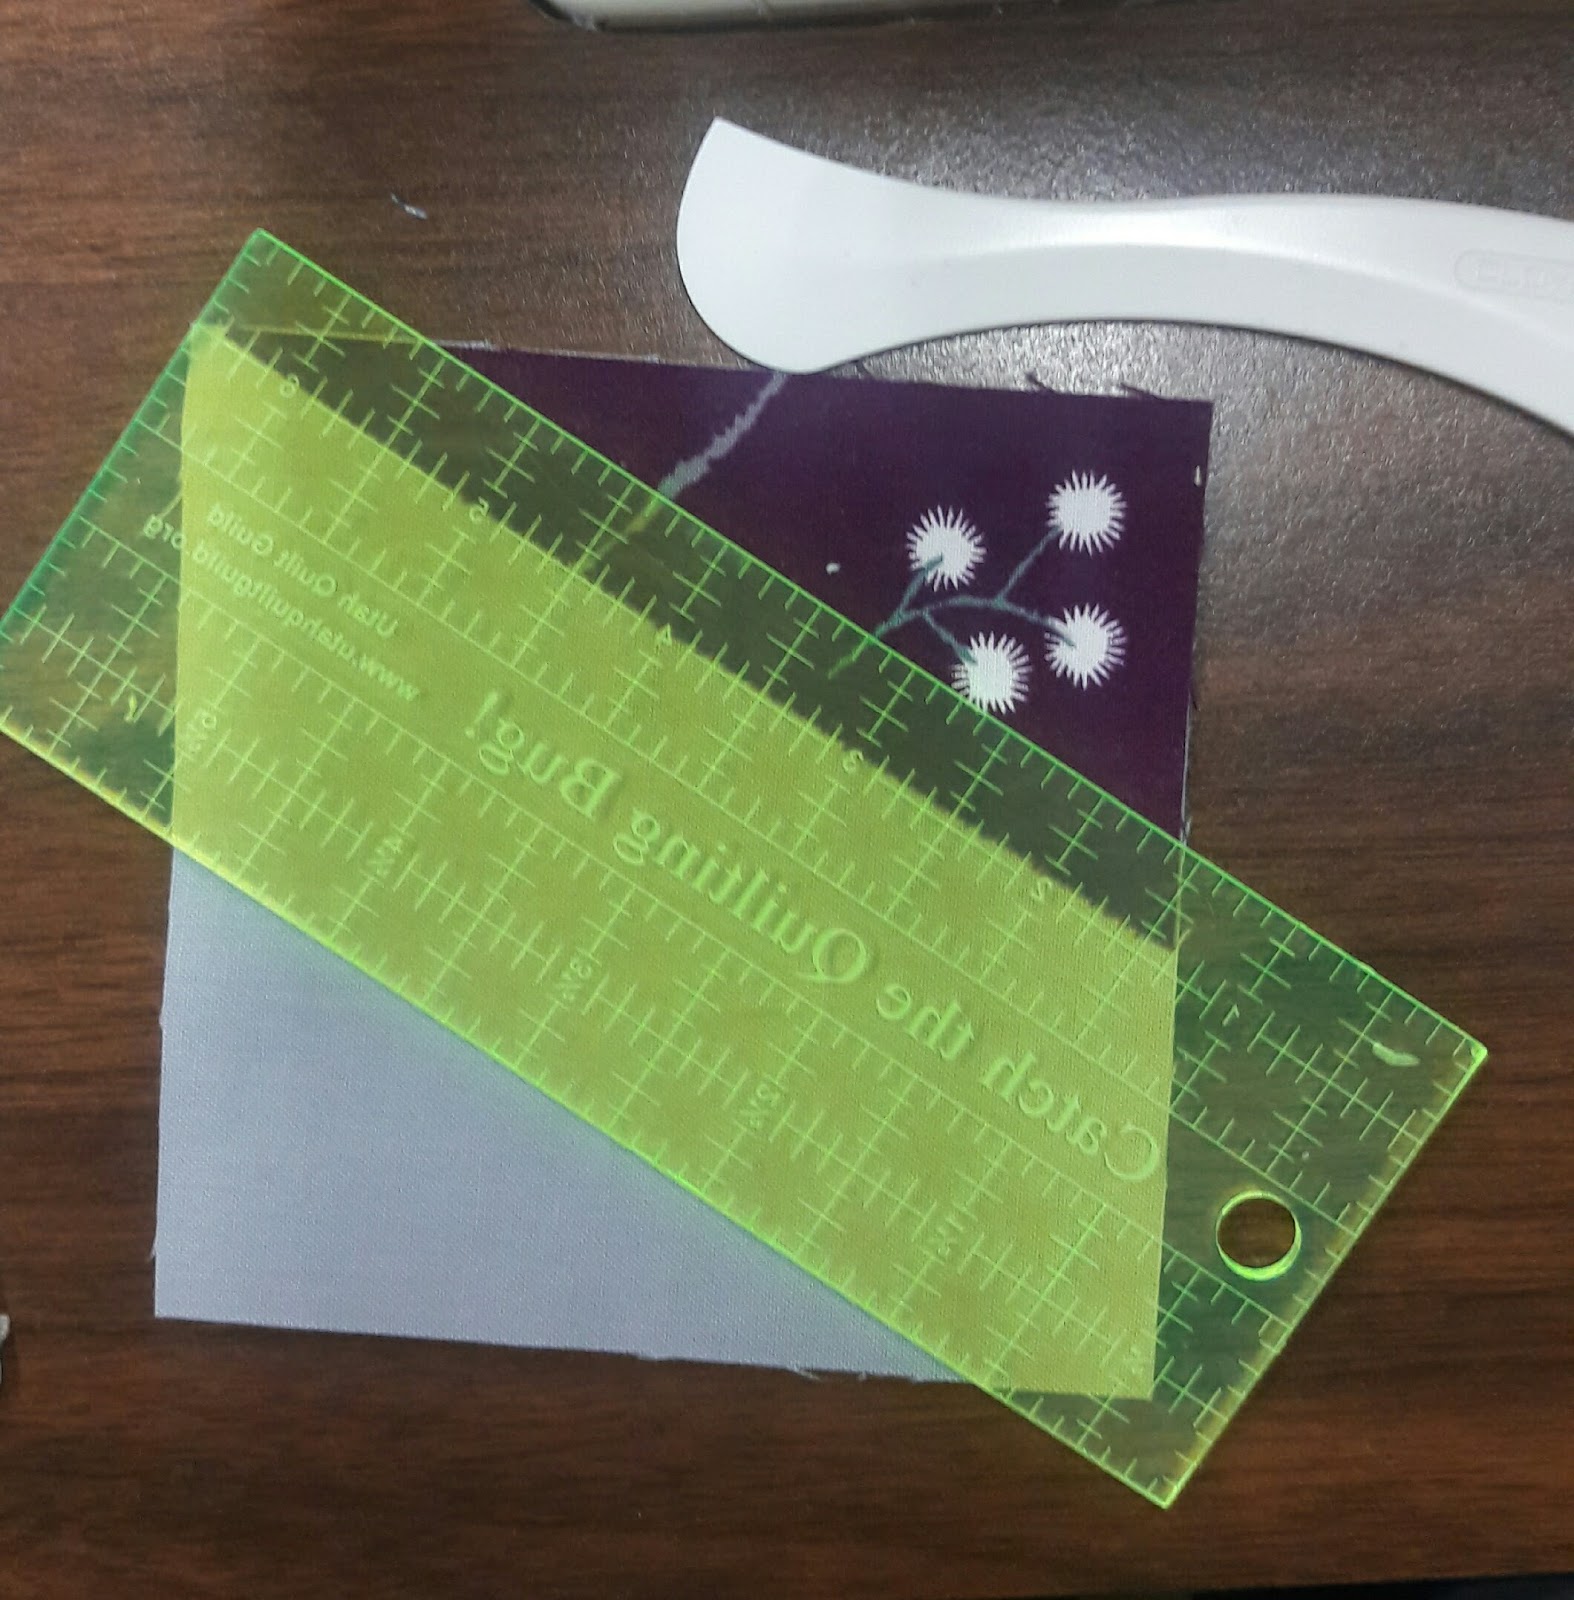
It will leave a crease in both of your fabrics.
Line up the edge of your triangle along the crease it made on your background fabric. You will want to make sure the the point on the short side of your triangle only hangs over 1/4″ the point on the long side will hang over more. Sew 1/4″ along the edge of your triangle. If you don’t have a Hera marker you can eyeball it but I found I did a lot of reverse sewing if I did it this way. I’d always have a part of the background corner showing. Using the Hear marker seemed to take care of this problem.
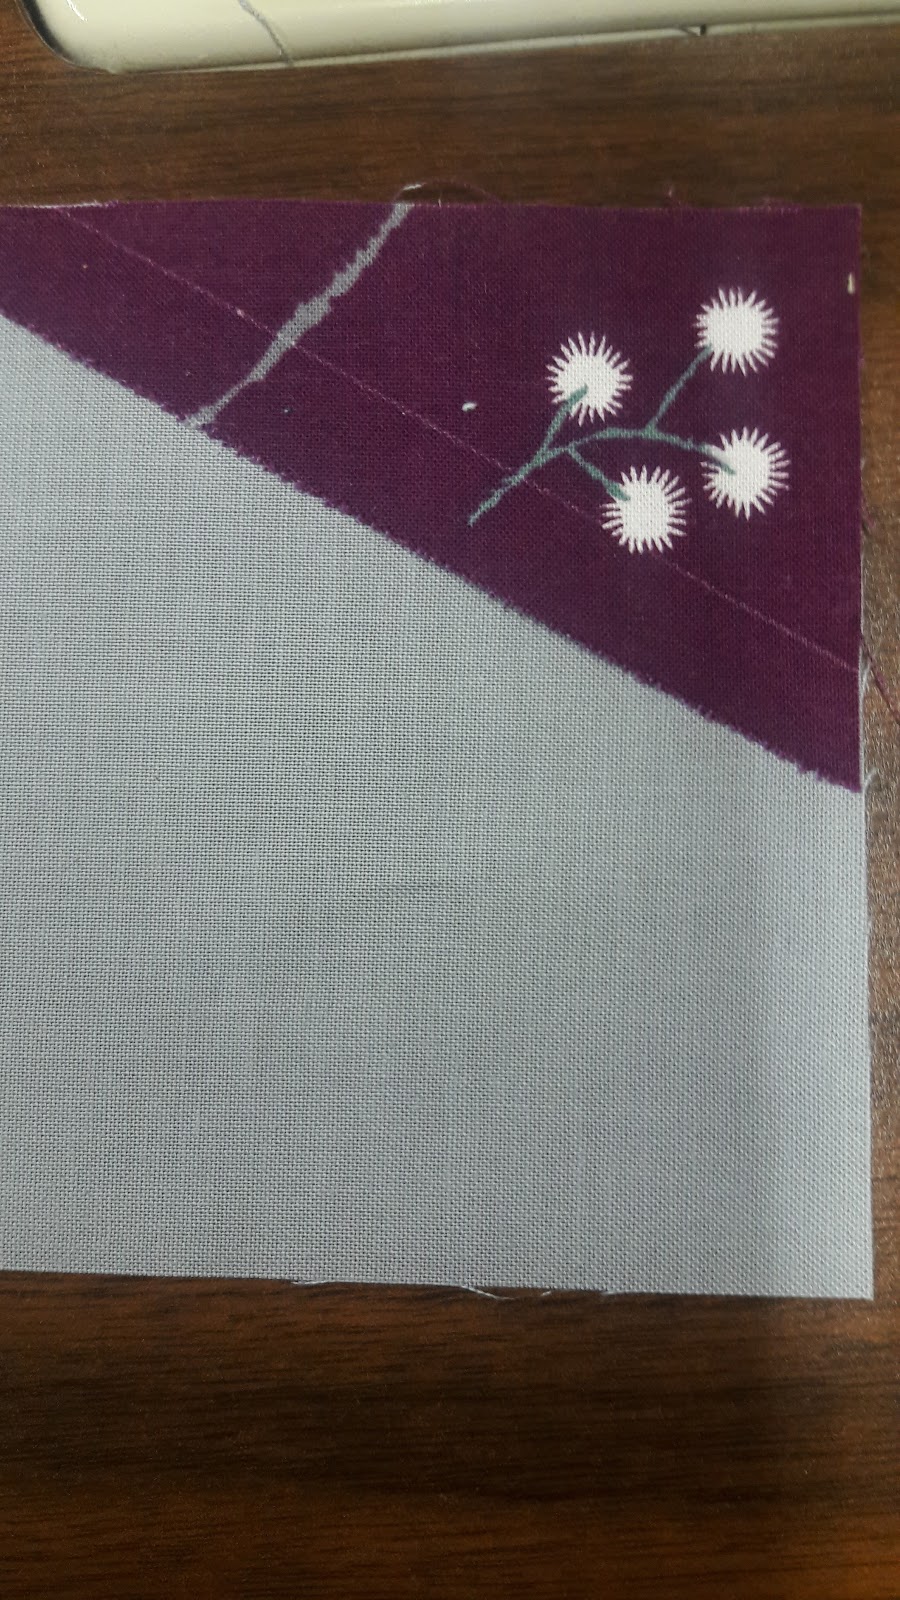
Press your triangle back so it cover the background corner.
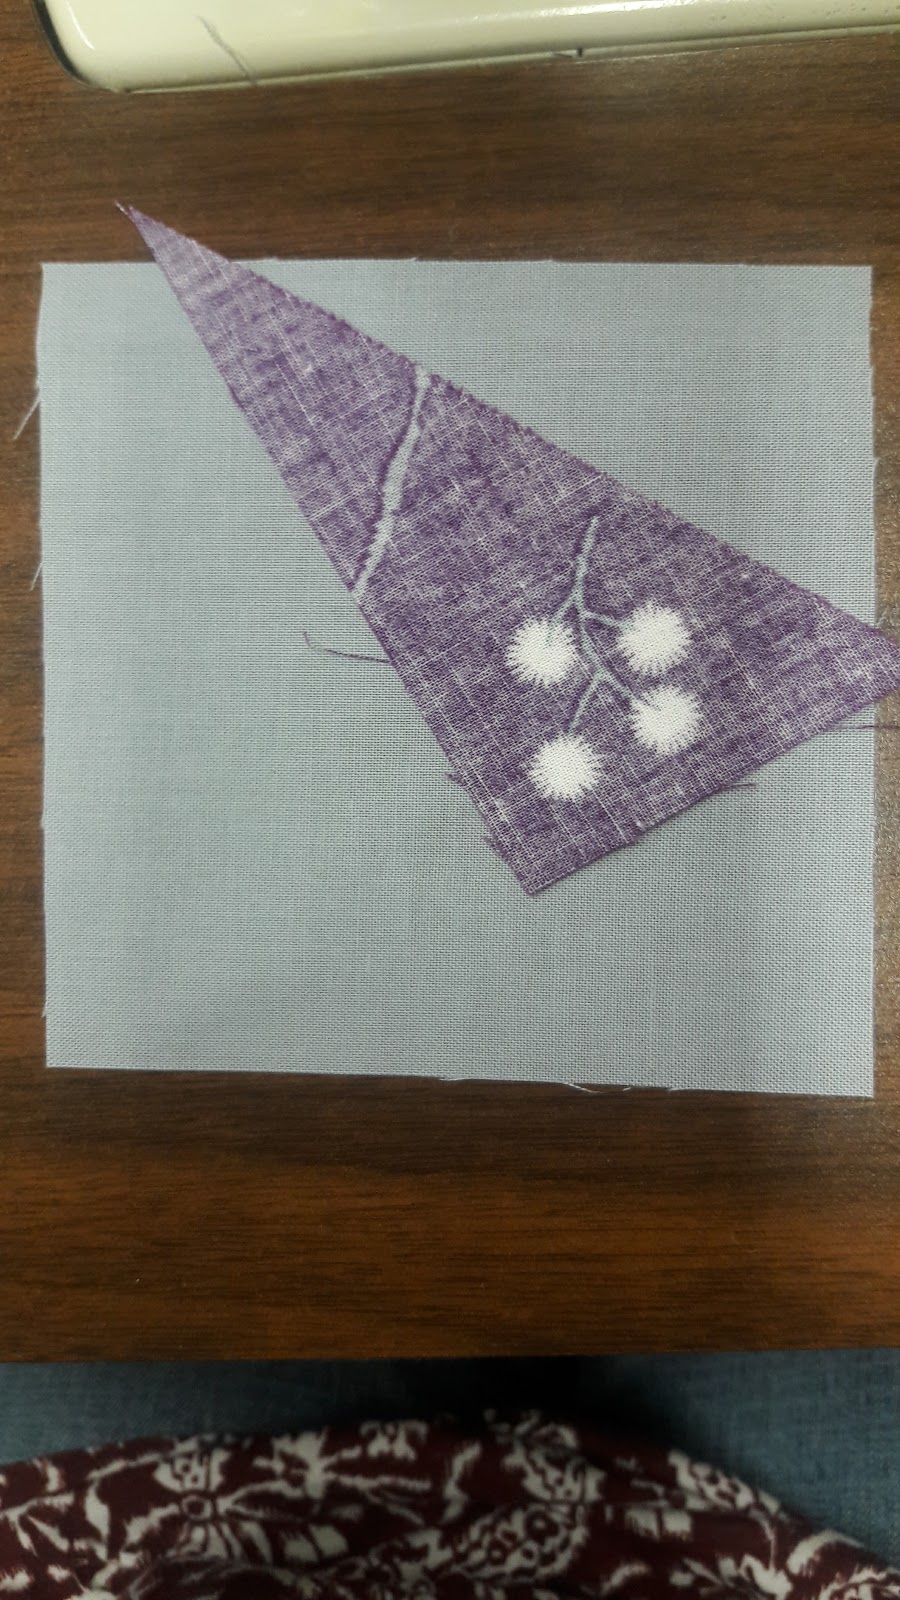
Repeat the process with another triangle this one the mirror of the previous at least as far as the right angles are concerned.
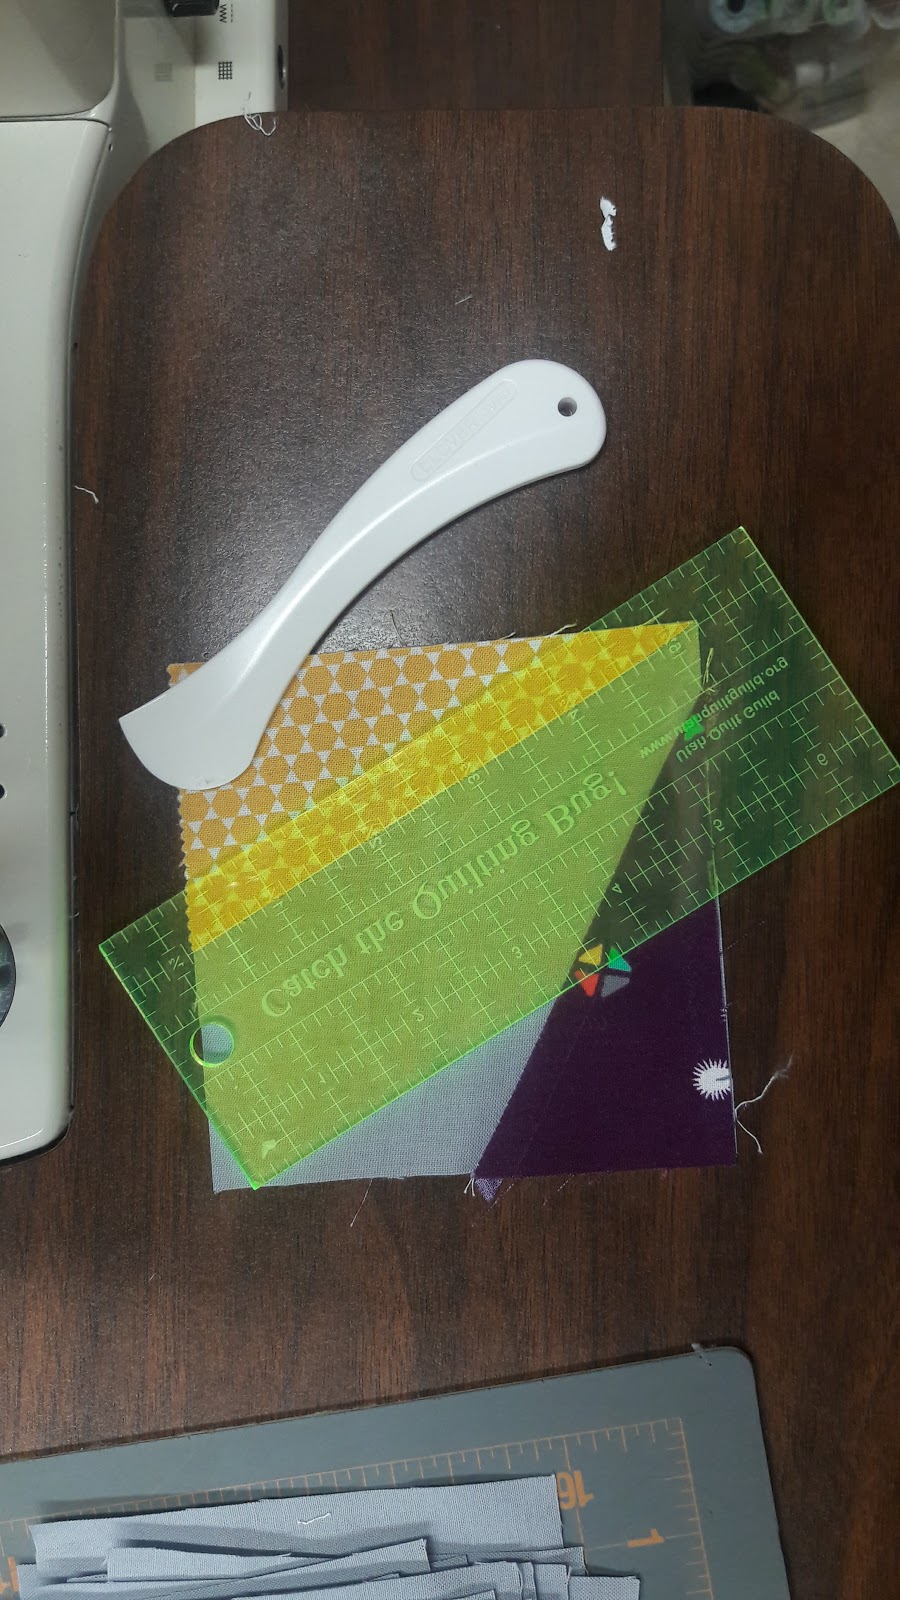
Square up your block
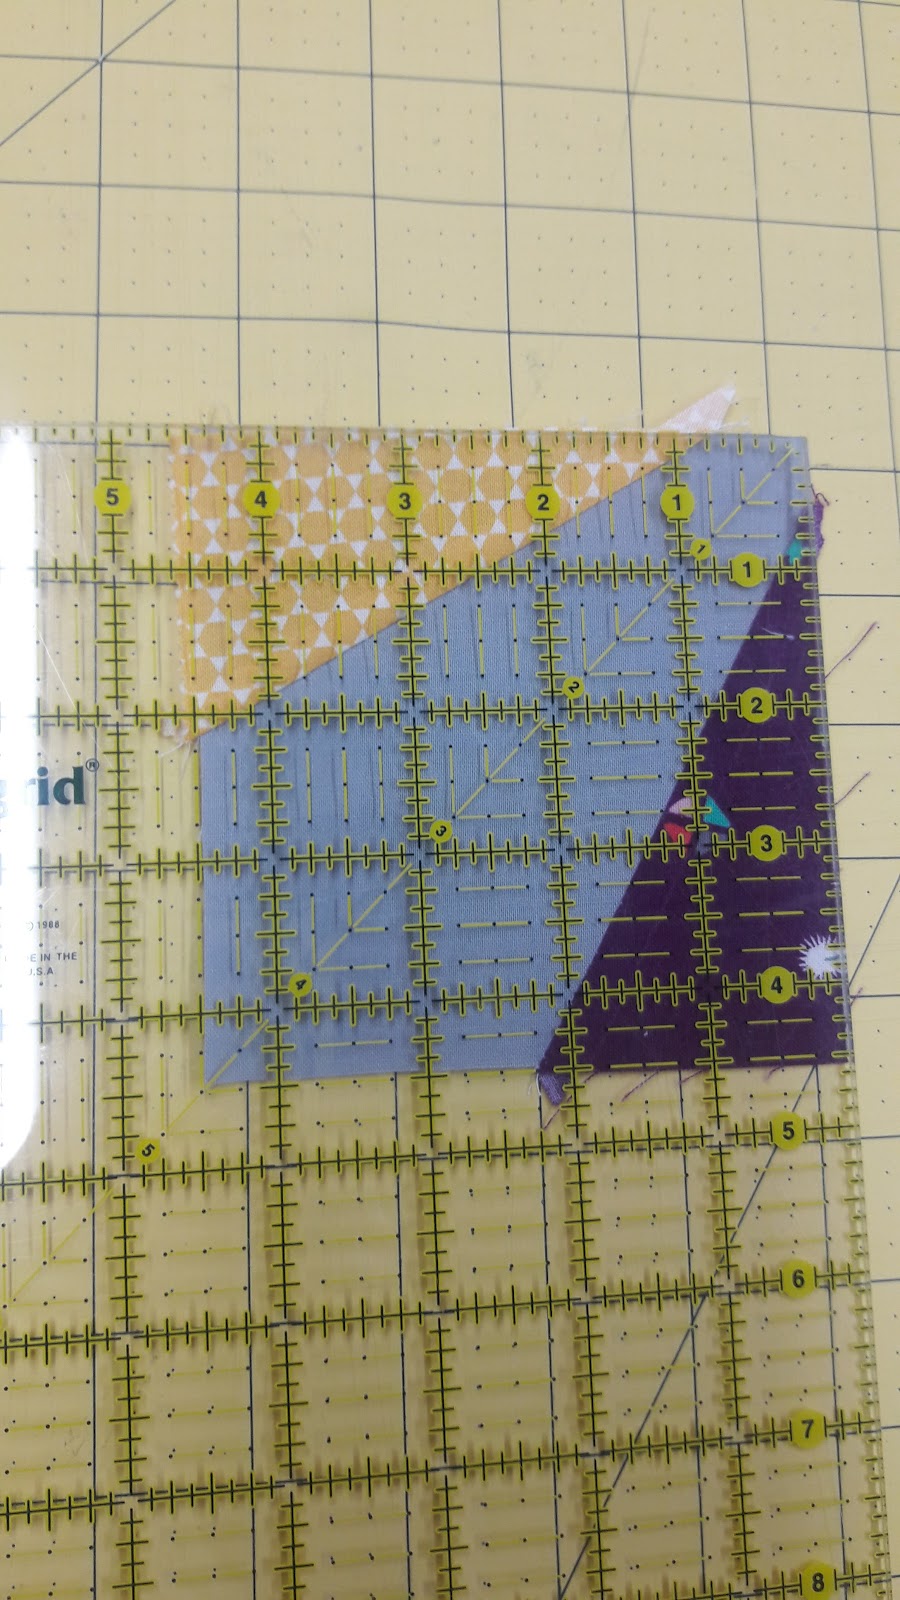
To get rid of dog ears and any little discrepancies.

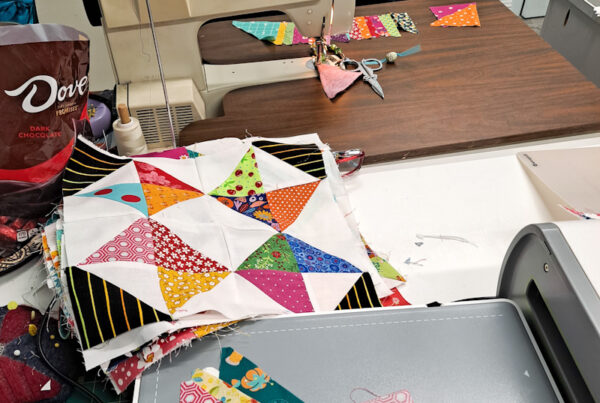
Repeat process for the desired amount of blocks. I made 270 or 15 x 18 rows. It should measure 60″ x 72″.
Now to sew the blocks into rows and then the rows together. Let me know if you have any questions.


References:
Boulevard casino https://amberqzpu698505.develop-blog.com/49460538/casino-of-gold-dein-ultimativer-guide
References:
China shores slot machine https://notes.medien.rwth-aachen.de/sm_X9hcKSra7D-b3BLuXKw/
References:
Luigi Casino marina-bay-sands-casino-singapore.online-spielhallen.de
References:
Handy casino echtgeld app Revolution Casino Bonus ohne Einzahlung
References:
Urlaub Gran Canaria Casino Live Casino Spiele
References:
Legiano Casino Verifizierung http://maps.google.mv/url?q=https://forums-archive.kanoplay.com/proxy.php?link=https://de.trustpilot.com/review/beyondjewellery.de
References:
Cramps in feet https://kpbc.umk.pl/dlibra/login?refUrl=aHR0cHM6Ly93d3cucHJpdmF0ZWNhbXMuY29tOjQ0My9leHRlcm5hbF9saW5rLz91cmw9aHR0cHM6Ly9kZS50cnVzdHBpbG90LmNvbS9yZXZpZXcvb3dvd2Vhci5kZQ
References:
Legiano Casino Verifizierung cse.google.lt
References:
Hitnspin casino live spiele https://tehnoforum.com
References:
Hit’n’spin casino 25 euro code https://edufuture.biz/
References:
Hitnspin casino mobile https://discuss.7msport.com/wap/en/reply.aspx?no=347024&pid=934632&url=https://sosi.al/juanitaludlum
References:
Hitnspin anmelden https://board-de.drakensang.com/proxy.php?link=https://intensedebate.com/people/goatorgan99
References:
Hit’n’spin casino 25 euro bonus ohne einzahlung w25.ownskin.com
References:
Hit’n’spin casino login https://vocerh.abril.com.br
References:
Hitnspin casino live downloader.la
References:
Hitnspin casino alternative trac.filezilla-project.org
You are so interesting! I do not think I’ve truly read through
anything like that before. So wonderful to discover somebody with original thoughts on this issue.
Really.. thanks for starting this up. This web site is something that’s needed on the internet,
someone with a little originality!
References:
Lollybet Test http://www.ironhidegames.com
References:
Lollybet Casino Paysafecard http://cse.google.dz/
References:
Hit’n’spin casino 25 euro bonus ohne einzahlung
http://clients1.google.fm/
References:
Hitnspin casino test images.google.com.ar
References:
Hitnspin registrierung http://cse.google.am/url?sa=t&url=https://novelticket06.bravejournal.net/spielen-and-gewinnen
References:
Hitnspin casino aktionscode grch37.ensembl.org
References:
Hitnspin casino anmeldung http://clients1.google.nr/
References:
Payid withdrawal pokies https://nfccardmaker.com/jaydenmarcus3
References:
Payid pokies instant withdrawal https://repo.qruize.com/kristykeel877
References:
Payid pokies instant withdrawal taradmai.com
References:
Online pokies with payid australia real money career.agricodeexpo.org
References:
Online pokies with payid dammsound.com
References:
Payid online pokies australia cyprusjobs.com.cy
References:
Pokies net australia payid withdrawal https://jobcop.ca/employer/no-deposit-bonus-payid-casino-australia-2026-claim/