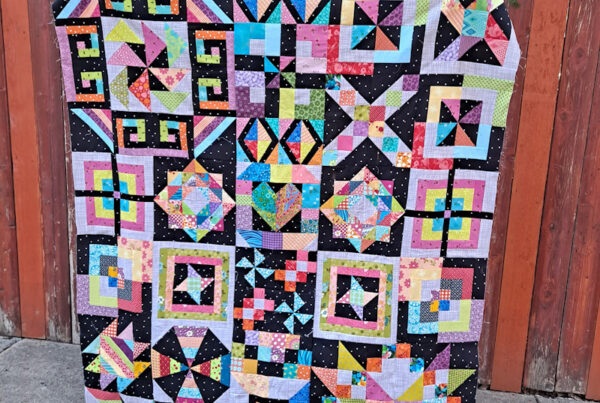
If you’re like me you love all the color and interest of a scrap quilt. But you may feel overwhelmed when it comes to combining all those fabrics and colors. Today I share a little step by step to give you the skills and confidence to create a scrap quilt.
Fabric and Pattern
The first step is to gather your fabric scraps. My method sorts by color and size. So they are easy to find and use. When gathering fabric for a project you may want to choose a colorway, for a more controlled look. You can also choose a theme like, patriotic, spring, brights, etc. With your colorway or theme in mind start pulling fabrics from your bins.
Next you’ll want to make sure you have a good value range. This means you have a range of light and dark fabrics. Value allows your design to blend by having similar values next to each other. Or pop by having high contrasting light and dark fabrics next to one another.

You will also need to choose a pattern. I like to do this after I see what fabric scraps I have to work with. If I have a lot of strips, I’ll want a pattern that will help me incorporate them. Looking patterns that use strips and strings? Try this post.
Maybe you have chunkier pieces. Try making a quilt using these great scrap busting quilt blocks. Or maybe you are looking to use up those itty bitty pieces. I also have patterns designed to use all of your scrap fabric, no matter what size.
After choosing your fabric and pattern you’ll need to cut your fabric. When I can I prefer my AccuQuilt It is fast, easy and accurate. If you don’t have an AccuQuilt, or the pattern you chose won’t work with the dies. Then try this post full of tips for accurate cutting. Afterall it is the first step to ensure accurate piecing.
Cutting and Sewing
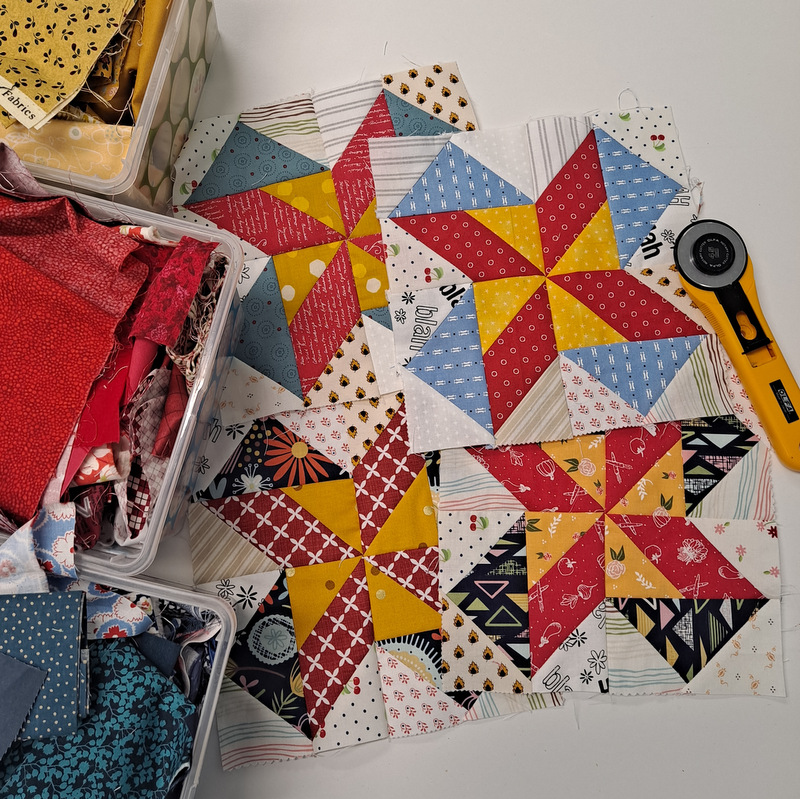
Next you’ll sew the pieces together according to the pattern instructions. Be mindful of an accurate 1/4″ seam. Use good pressing techniques. This keep your fabrics from distorting and help your quilt top lay flat. Pressing means just that press. Don’t move the iron around from side to side.
 Once you’ve sewn your blocks arrange them. I like to use my design wall for this. But you can use a flannel backed tablecloth pinned to the wall. Or your floor if you don’t have pets and children who may walk through and mess it up.
When your quilt is sewn you will want to make a quilt sandwich. This consists of layering the top, batting and backing. You can use basting spray or safety pins to hold the layers together. Once your quilt is basted it’s time to quilt and bind. Try this post to make finishing your quilt a cinch.
Now all you have to do is enjoy the quilt.